

Understanding Webhooks in Headless CMS


Modern development has transformed communication in numerous ways. As things evolve, the desire to communicate effectively with people sets.
To attain such a communication demand we need, we need to find a way to make technologies talk to each other. That’s where webhooks come into the picture. Getting webhooks set up in a Headless CMS is much easier, faster, and cost-effective compared to setting it up via API approach.
In this article, we would look at how we could set up webhooks using Agility CMS, a Headless CMS that's is supercharged with JAMstack. It integrates seamlessly with modern, blazing-fast website frameworks and enables high-performance digital experiences.
This article will be useful for you if;
you know the differences between an API and a Webhook, otherwise, check this 4 mins piece
you have built real-time applications that deliver data as an event happens or immediately using API.
you are already building webhooks with 3rd party applications, and you want to check out alternatives.
We will look at how to build a real-time, event-based simple app using Webhooks in Agility CMS. Let's get to it!
Note: This article assumes you're comfortable with the basics of Node.Js.
What is WebHooks?
Webhooks are automated messages that are sent each time an event happens. They have one unique mission: transmitting a message or data to a unique address or URL. Is a way for an app to provide other applications with real-time information. It delivers data as an event happens or almost immediately.
When to Use Webhooks
Webhooks usually acts as a messenger for smaller data. It helps to send and extracting real-time updates.
One of the most suitable scenarios for using a webhook is when your app or platform requires a real-time feature and you don't want to use an API, because you don't want to get entangled with the setups and waste resources in the process. In such instances, a webhook framework will be most beneficial.
Another best use case for using a webhook is where an API isn't provided or the available API isn't best fit to act, a webhook could be used instead in such a situation.
Webhooks can be regarded as a perfect, and sometimes even essential complement to API-based application integration.
This can be used to set up notification workflows in Slack, automatically redeploy static websites to Netlify, as well as a variety of other automation use cases.
Benefits of Webhooks
- It helps for clearing and managing a custom cache in an external system such as a website, mobile application, or database.
- It provides a way to sync content/data for integrations with third-party systems (i.e. Salesforce, Mailchimp, etc).
- It helps when building custom content workflows.
Kick-off a CI/D pipeline to redeploy your website when content has been updated is possible with webhooks- this is often used for JAMstack sites that are built using static site generators.
Using webhooks in a Headless CMS(Agility CMS)
In this tutorial, we will see how to integrate webhooks in a headless CMS, and our choice would be Agility CMS.
Agility CMS is a JAMStack focused Headless CMS with Page Management built-in. Faster to build, manage, and deploy. Agility CMS is a Content-First Headless CMS, allowing you to choose any programming language while also getting the flexibility, speed, and power that comes from lightweight APIs. From there, you could add features like Page Management, Ecommerce, Online Ticketing, and Search. Agility CMS becomes a complete Digital Experience Platform–saving time, removing limitations, and allowing for seamless experiences across all digital channels.
Implementing Webhooks with Agility CMS
This works by providing a list or URL endpoints to Agility CMS. Each time content changes in the CMS, Agility will notify each endpoint of the change and pass-on a message representing the exact change that occurred.
How to Add a Webhook Endpoint
In order to add a webhook, you must have access to an Agility CMS instance with Content Fetch API enabled. To get started signup for free on Agility CMS.
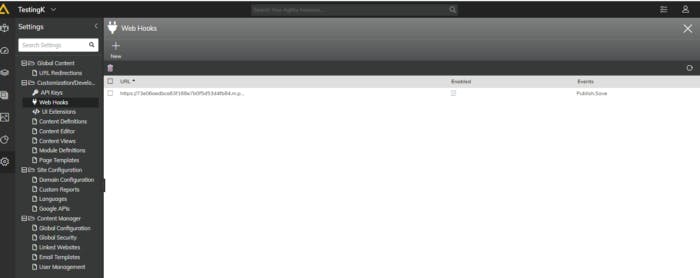
- Next, In Agility CMS, navigate to Settings > Customization/Development > Webhooks.

- Click Add (+) to add a webhook endpoint.
- Add your endpoint here
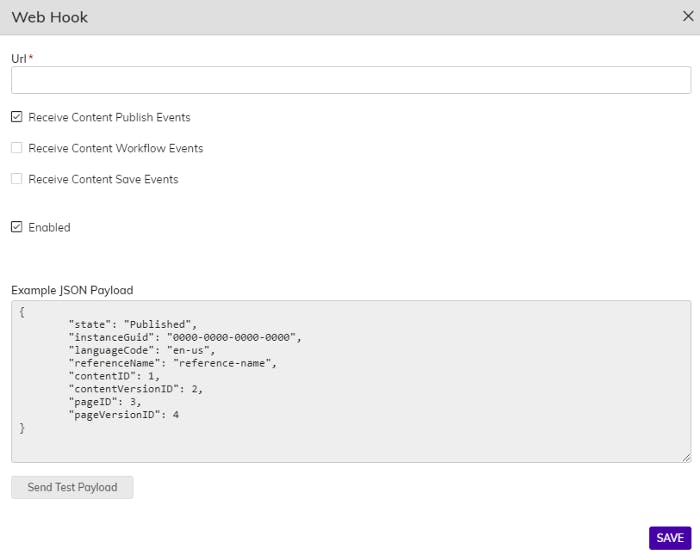
In the Webhook details flyout, enter the Url endpoint that you want to send events to.
For testing, we recommend using a free service such as requestbin which allows you to set up an endpoint and monitor the messages that get sent there.
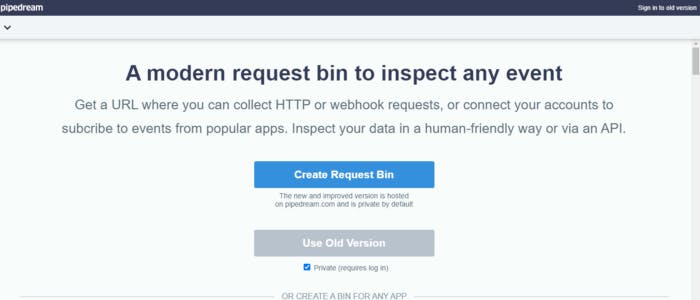
After signing up/logging into their service, we get a Url we can use. Image for post
Next, select what type of Events this webhook should be subscribed to. You can optionally subscribe to all events (Publishes, Workflow Approvals, and Content Saves) or select only the type(s) you need.
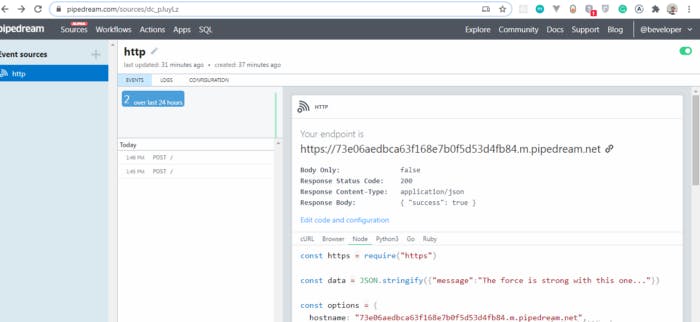
- Copy the URL given to you and paste it in your Agility Instance webhook page.
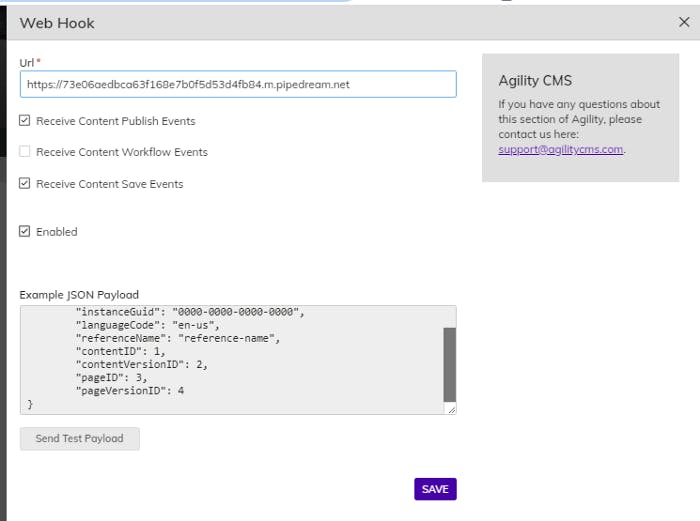
When you are ready, click the Send Test Payload button to test your webhook endpoint. This will generate a sample request to your defined endpoint Url and log the result.
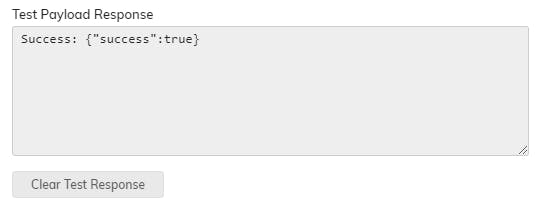
If you created a request bin endpoint, you can verify the payload that was sent there.

**When ready, click Save to save your webhook.
Payload Details
Page Events On Save:
{
"state": "Saved",
"instanceGuid": "0000-0000-0000-0000",
"languageCode": "en-us",
"referenceName": "reference-name",
"contentID": 1,
"contentVersionID": 2,
"pageID": 3,
"pageVersionID": 4
}
On Publish: Content Events
{
"state": "Published",
"instanceGuid": "0000-0000-0000-0000",
"languageCode": "en-us",
"referenceName": "reference-name",
"contentID": 1,
"contentVersionID": 2,
"pageID": 3,
"pageVersionID": 4
}
On Save:
{
"state": "Saved",
"instanceGuid": "0000-0000-0000-0000",
"languageCode": "en-us",
"referenceName": "post",
"contentID": 1,
"contentVersionID": 2,
"pageID": 3,
"pageVersionID": 4
}
On Publish:
{
"state": "Published",
"instanceGuid": "0000-0000-0000-0000",
"languageCode": "en-us",
"referenceName": "post",
"contentID": 1,
"contentVersionID": 2,
"pageID": 3,
"pageVersionID": 4
}
Conclusion
In this article, we have seen how to seamlessly integrate webhooks in a Headless CMS using Agility CMS. You’d agree with me that it’s far much simpler compared to if you were using an API. I’d like to see what you come up with within the comment section, perhaps you’d prefer some another approach and why.
Resources
API vs WEBHOOKS: What’s the difference — Agility CMS